教學 免費部署 Elixir / Phoenix APP 在 Gigalixir 上

/phoenix/deploy-with-gigalixir/cover.webp

開頭

說實話,對於 Elxiir / Phoenix APP 的 Deployment 部署來說,說簡單其實也不簡單。好在現在市面上越來越多工具與平台幫我們簡化了流程,讓我們能更快速地部屬自己的 APP。

根據Phoenix 官方手冊,讓我們能快速部署的最主要兩個一條龍平台就是 GigalixirFly.io,一條龍就是所有東西都包辦了,當然也包含了 Postgres 的部署。我們只需要幾個指令就可以讓我們的 APP 上線了。

官方有提到 Heroku 但並不建議。因為 Heroku 會限制同時連線的數量與每個連線的持續時間,這對於 Elixir / Phoniex 的特性來說可是大大折扣。畢竟 Elixir 就是靠超多 light-weight process 來提升擴展性的。

廢話不多說,本篇文章主要會介紹如何部署在 Gigalixir 上的流程,我們直接開始。

準備與環境

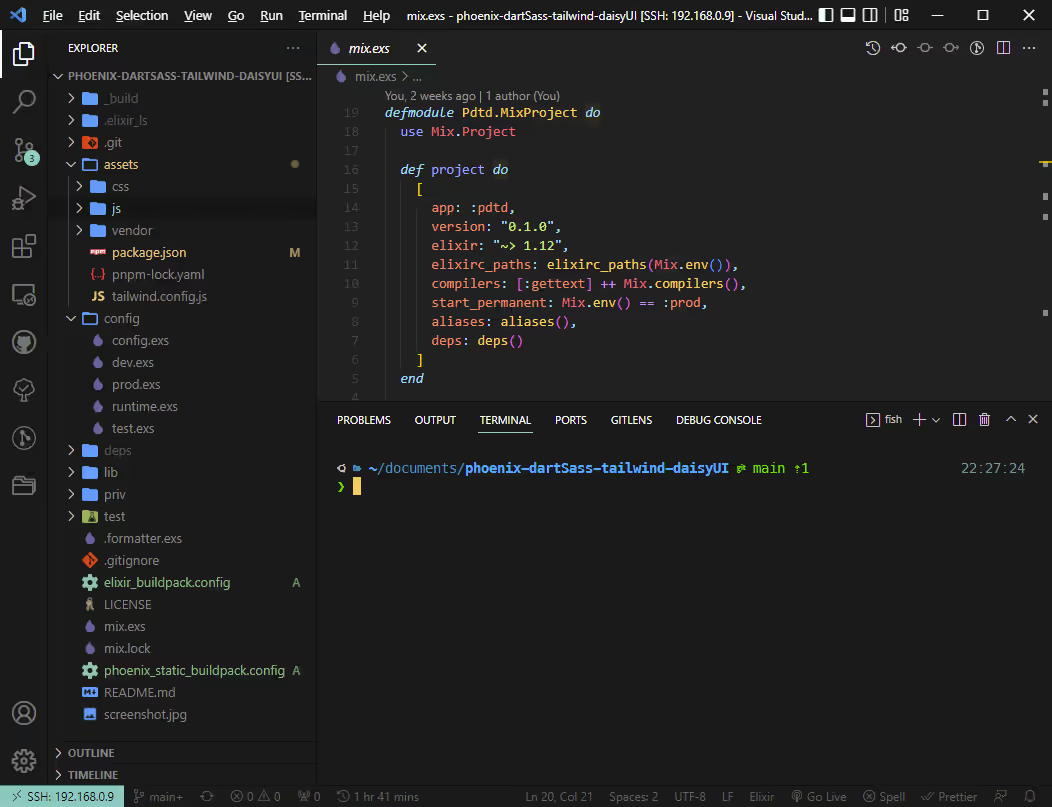
這邊我會用我們之前寫的一個 Demo 來作範例

我是在 Windows 上使用 VSCode Remote Ubuntu Server 進行開發的,所以以下的教學會以 Ubuntu 為主。
deploy-with-gigalixir/fig01.avif

安裝 Gigalixir CLI

使用 pip3 安裝

shell
pip3 install gigalixir --user

新增 Gigalixir CLI 安裝路徑 ~/.local/bin 到 Path (適用 Fish Shell)

shell
echo 'fish_add_path ~/.local/bin' >> ~/.config/fish/config.fish
source ~/.config/fish/config.fish

! 若還沒有嘗試過 Fish Shell,可以參考 Ubuntu 安裝 Fish + Oh My Fish + Tide 與各種插件

驗證安裝

shell
gigalixir --help

註冊 Gigalixir

shell
gigalixir signup

接受條款之後,輸入 Email 等等資訊…

shell
❯ gigalixir signup
GIGALIXIR Terms of Service: https://www.gigalixir.com/terms
GIGALIXIR Privacy Policy: https://www.gigalixir.com/privacy
Do you accept the Terms of Service and Privacy Policy? [y/N]: y
Email:

註冊完畢之後,登入帳號

shell
gigalixir login

輸入之前註冊的資訊

shell
gigalixir login
Email: ****
Password: ****
Would you like us to save your api key to your ~/.netrc file? [Y/n]:
Logged in as ****

驗證登入

shell
gigalixir account

下載 Demo Project

shell
git clone git@github.com:kwchang0831/phoenix-dartSass-tailwind-daisyUI.git

進入資料夾

shell
cd phoenix-dartSass-tailwind-daisyUI

部署至 Gigalixir

在 Gigalixr 建立一個 APP (名字可以自行更改)

shell
gigalixir create -n "pdtd"

驗證 APP 創建

shell
gigalixir apps

驗證 Git Remote

shell
git remote -v
shell
❯ git remote -v
gigalixir https://git.gigalixir.com/******** (fetch)
gigalixir https://git.gigalixir.com/******** (push)
origin git@github.com:kwchang0831/phoenix-dartSass-tailwind-daisyUI.git (fetch)
origin git@github.com:kwchang0831/phoenix-dartSass-tailwind-daisyUI.git (push)

設定 Gigalixr 執行環境,建立設定檔

shell
echo 'elixir_version=1.13.4' > elixir_buildpack.config
echo 'erlang_version=25.0' >> elixir_buildpack.config
echo 'node_version=18.3.0' > phoenix_static_buildpack.config

assets/package.json 新增設定啟動 Script

package.json
shell
{
"scripts": {
"deploy": "cd .. && mix assets.deploy && rm -f _build/esbuild*"
},
...
}

上傳至 Gigalixir

shell
git add elixir_buildpack.config phoenix_static_buildpack.config assets/package.json
git commit -m "Ready to Gigalixir"
git push gigalixir

最後應該會給你,你的 APP 網址 https://pdtd.gigalixirapp.com/

shell
...
remote: Try hitting your app with: curl https://pdtd.gigalixirapp.com/
remote: Check your app logs with: gigalixir logs -a pdtd
remote: Check deploy status with: gigalixir ps -a pdtd
remote: Updated property [core/account].
...

先確認執行狀態,等 status 轉變成 “Healthy”

shell
gigalixir ps

或是檢查看看 log

shell
gigalixir logs

眼尖的你可能發現會發現log中為啥 Endpoint 指向的 host 是 example.com

那是因為 config/runtime.exs 中的環境變數 PHX_HOST 我們從來沒有設定過

config/runtime.exs
elixir
...
host = System.get_env("PHX_HOST") || "example.com"
port = String.to_integer(System.get_env("PORT") || "4000")
...

設定 Gigalixir 上的環境變數

設定 PHX_HOST 環境參數,用剛剛得到的 APP 網址除去 https://

shell
gigalixir config:set PHX_HOST=pdtd.gigalixirapp.com

驗證參數

shell
gigalixir config

若要移除參數

shell
gigalixir config:unset PHX_HOST

完成 Deploy

現在你登入網址上去看看,應該可以看到成果了。

這個範例,並沒有用到 Database 或 LiveView,若有用到還需要額外的一些步驟。

(額外) 部署 Postgres

若是你的 Project 有使用到 Postgres 的話,我們還需要在 Gigalixir 上建立一個免費的資料庫

shell
gigalixir pg:create --free

確認了解免費的資料庫並不適合用作 production 等級來使用

shell
❯ gigalixir pg:create --free
A word of caution: Free tier databases are not suitable for production and migrating from a free db to a standard db is not trivial. Do you wish to continue? [y/N]: y

驗證 Config,環境變數有新增 DATABASE_URLPOOL_SIZE

shell
gigalixir config

驗證 Database 已經創建

shell
gigalixir pg

進行 DB Migration

shell
gigalixir run mix ecto.migrate

確認狀態

shell
gigalixir logs

(額外) 其他設定

修改 config/runtime.exsRepo,確保與 database 之間連線是採用SSL

config/runtime.exs
elixir
config :pdtd, Pdtd.Repo,
ssl: true,
...

修改 config/prod.exsEndpoint

config/runtime.exs
elixir
...
config :pdtd, PdtdWeb.Endpoint,
cache_static_manifest: "priv/static/cache_manifest.json",
force_ssl: [rewrite_on: [:x_forwarded_proto]],
check_origin: ["https://pdtd.gigalixirapp.com"]
...

force_ssl 確保連線全部強迫改使用 https 來連線。

shell
❯ curl -s -D- http://pdtd.gigalixirapp.com/
HTTP/1.1 301 Moved Permanently
...

check_origin 如果不設定網域的話,你如果有用到 liveview 的話,你會碰到以下錯誤。

shell
This issue might be specific for subdomains. Not very sure in what other contexts this issue arrises.
[error] Could not check origin for Phoenix.Socket transport.
This happens when you are attempting a socket connection to
a different host than the one configured in your config/
files. For example, in development the host is configured
to "localhost" but you may be trying to access it from
"127.0.0.1". To fix this issue, you may either:
1. update [url: [host: ...]] to your actual host in the
config file for your current environment (recommended)
2. pass the :check_origin option when configuring your
endpoint or when configuring the transport in your
UserSocket module, explicitly outlining which origins
are allowed:
check_origin: ["https://example.com",
"//another.com:888", "//other.com"]

修改 config/runtime.exs ,增加網頁壓縮

config/runtime.exs
elixir
http: [
# Enable IPv6 and bind on all interfaces.
# Set it to {0, 0, 0, 0, 0, 0, 0, 1} for local network only access.
# See the documentation on https://hexdocs.pm/plug_cowboy/Plug.Cowboy.html
# for details about using IPv6 vs IPv4 and loopback vs public addresses.
ip: {0, 0, 0, 0, 0, 0, 0, 0},
port: port,
compress: true
],

客製化網域

新增要連結的網域,然後根據後續的指示,到你的 DNS 管理商那邊新增 CNAME 紀錄

shell
gigalixir domains:add {domain}

刪除連結的網域。(刪除 APP 前需要先刪除連結的網域)

shell
gigalixir domains:remove {domain}

刪除部署

若有甚麼問題,想要取消部署的話,請參照以下

若有 database,先刪除

shell
gigalixir ps:scale --replicas=0
gigalixir pg
gigalixir pg:destroy -d {database-id}

刪除 app

shell
gigalixir apps:destroy

驗證刪除

shell
❯ gigalixir apps
[]

最後

更多詳細資訊,請參考 Gigalixir 官方手冊

完結